PicGo/dsh-plugin
Upload images and files to your image host from DeepSeek Harness, powered by PicGo
Listed
4
Tools
Bundle verified
Preview
What it does
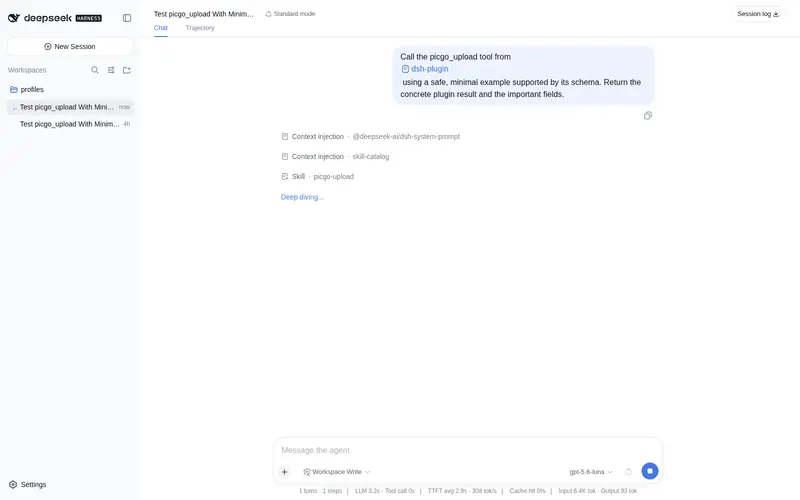
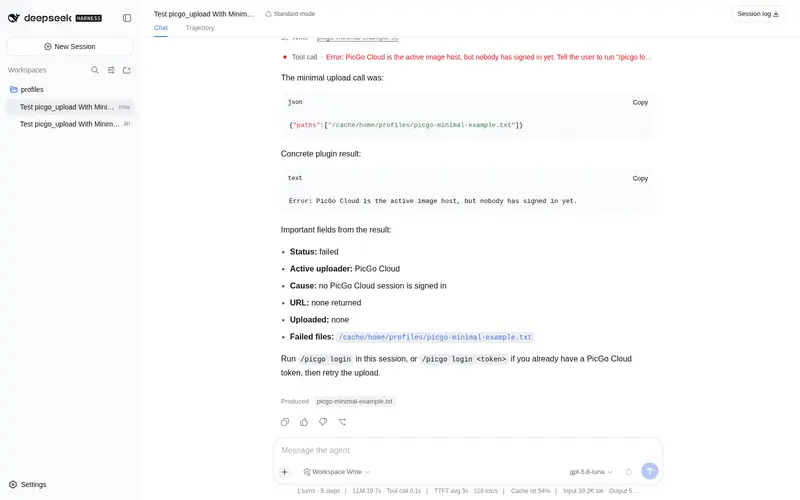
Upload local images and files to your image host through PicGo's existing configuration (PicGo Cloud, GitHub, S3, COS, Qiniu, or any installed uploader plugin), via a `picgo_upload` tool and a `/picgo` command.
Best for
- Documentation workflows that need local screenshots, charts, or generated images converted into shareable URLs.
- Existing PicGo users who want DSH to reuse their configured GitHub, S3, COS, Qiniu, or third-party uploader.
- Users who want either agent-driven file uploads or direct `/picgo` and clipboard uploads.
Not ideal for
- Sensitive or private files that must not be accessible through a public URL.
- Clipboard automation in headless environments; clipboard uploads require a desktop session and are command-only.
- Environments outside the documented Node `^22.19.0 || >=24.0.0` requirement or without a configured host or PicGo Cloud sign-in.
README
@picgo/dsh-plugin
Upload images and files to your image host from DeepSeek Harness, powered by PicGo.
Harness can show your agent a screenshot, but it has no way to turn a local file into a link. So when the agent writes a README, renders a chart, or captures a screenshot, the image stays on disk and  becomes a dead link the moment you push. This plugin closes that gap.
It uploads through whatever image host you already configured in PicGo — PicGo Cloud, GitHub, S3, Tencent COS, Qiniu, or any third-party uploader plugin you installed. Nothing to re-configure. If you’ve never used PicGo, it walks you into PicGo Cloud’s free tier.
Install
dsh plugin --profile web add @picgo/dsh-plugin
Then boot as usual:
dsh --profile web
What you get
picgo_upload — a tool the model calls on its own when a local file needs to become a link. Returns structured results, so in Code Mode you can use it directly:
const { uploaded } = await tools.picgo_upload({ paths: ['/tmp/chart.png'] })
console.log(uploaded[0].imgUrl)
/picgo — a command that uploads without spending a model turn:
| Command | What it does |
|---|---|
/picgo |
Upload the clipboard image |
/picgo <path>... |
Upload one or more files |
/picgo status |
Show the active host and sign-in state |
/picgo login [token] |
Sign in to PicGo Cloud |
/picgo logout |
Sign out |
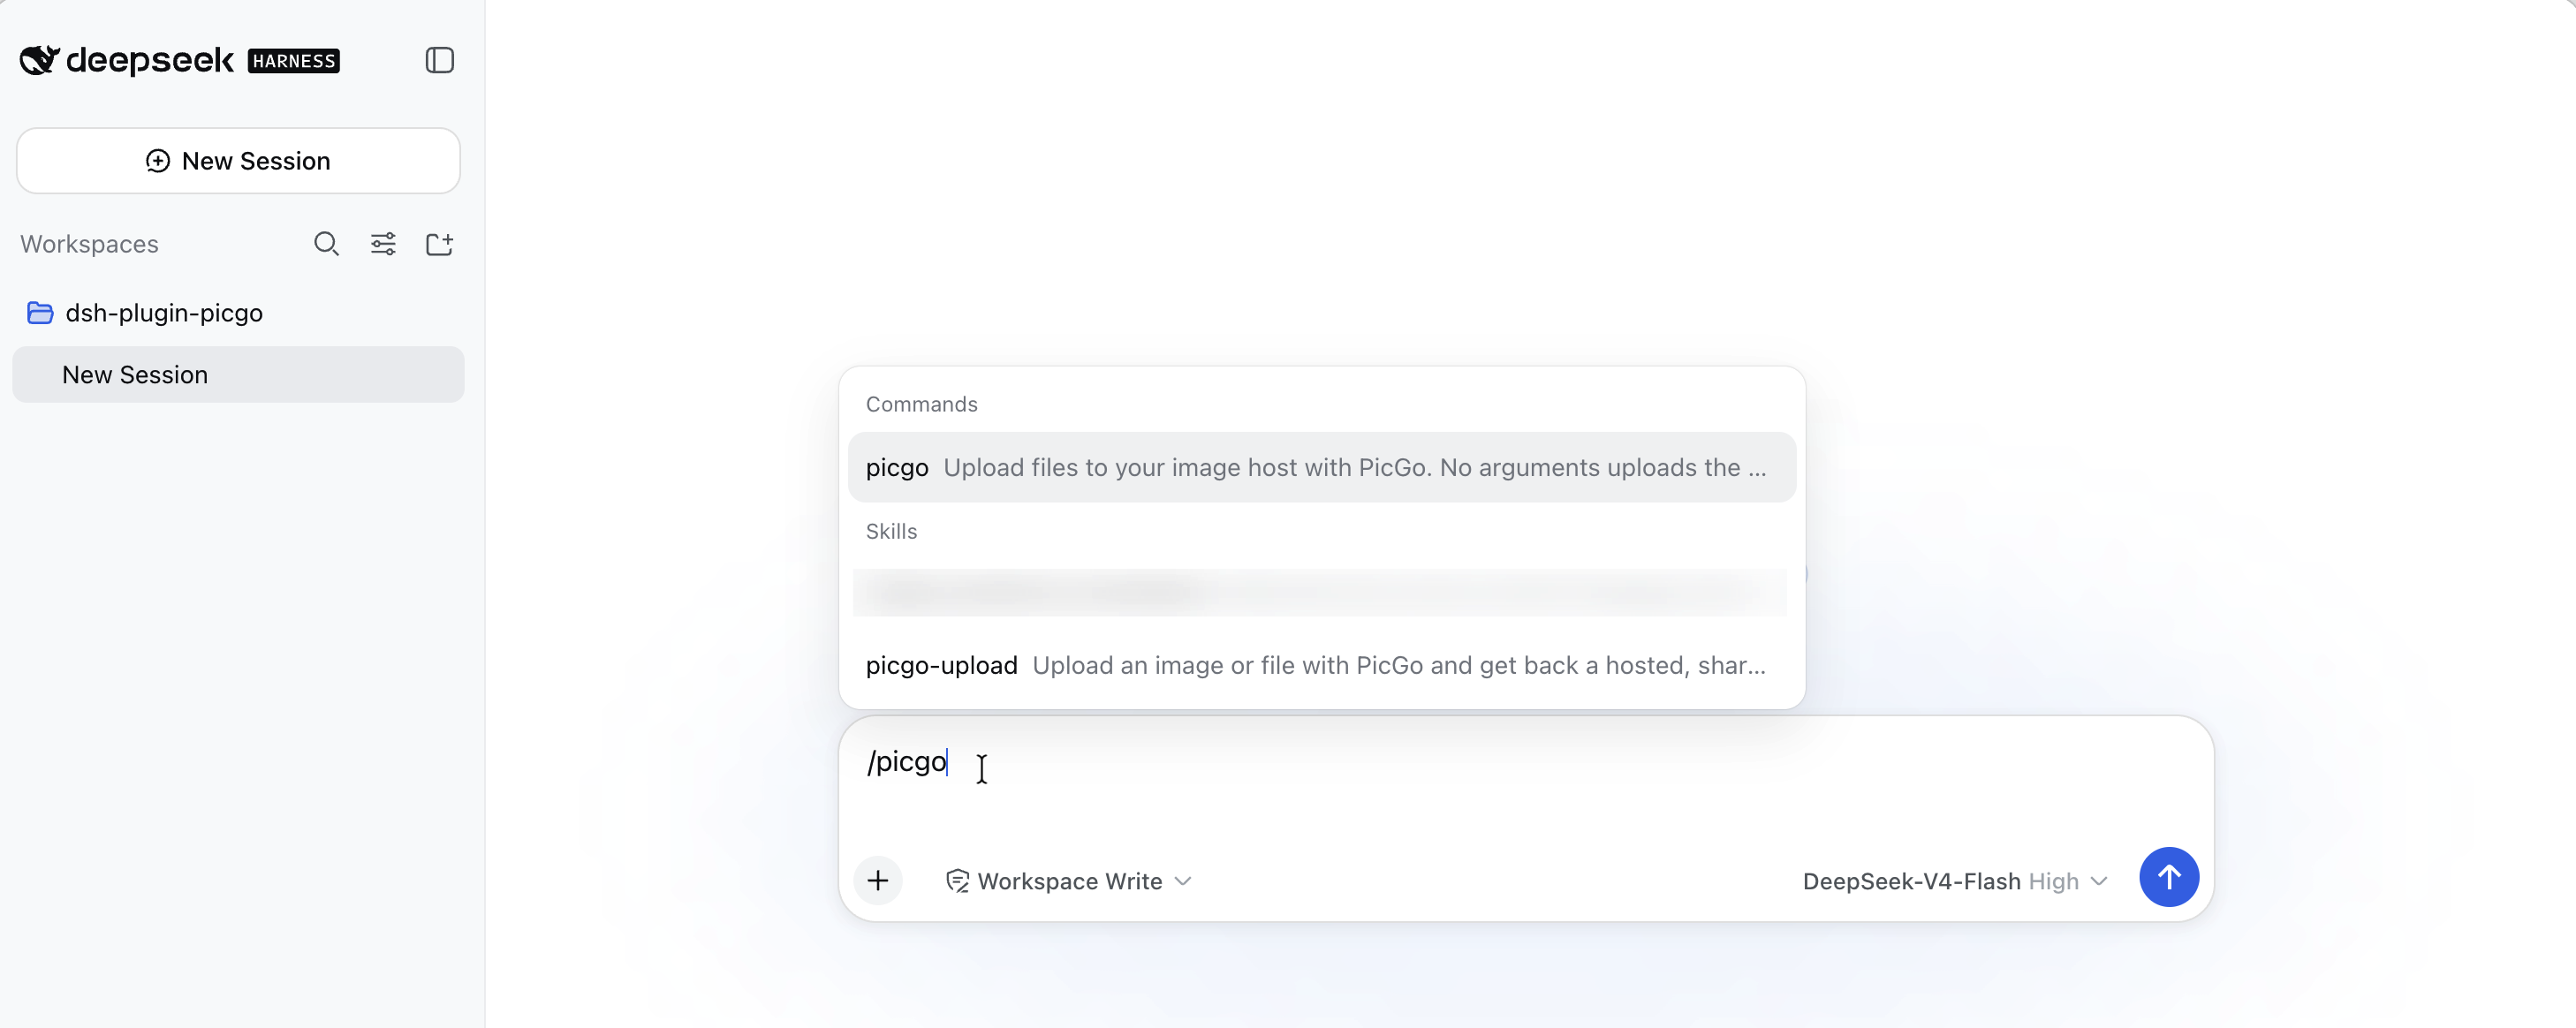
A bundled skill that teaches the model when to upload — inserting a screenshot into docs is the primary case — and when not to (you named a specific destination, you want a local copy).
First run
If you’ve never configured PicGo, uploads default to PicGo Cloud, which needs a one-time sign-in. The free tier covers casual use.
/picgo login
That opens your browser and reports back when it completes. If you already have a token from the PicGo Cloud dashboard, /picgo login <token> is instant.
The model will never run this for you: with no token the sign-in blocks waiting on a browser callback, which would hang the session. It relays the instruction and waits.
Already using GitHub, S3, or another host in PicGo? None of this applies — your existing config is used as-is and no sign-in is involved.
Configuration
Every field has a working default. Override them from your profile’s cordis.patch.yml:
- id: picgo
  name: '@picgo/dsh-plugin'
  config:
    silent: true
    timeoutMs: 120000
| Field | Default | Meaning |
|---|---|---|
configPath |
'' |
PicGo config file; empty uses PicGo’s own default (~/.picgo/config.json) |
silent |
true |
Suppress PicGo’s console output and its picgo.log writes |
timeoutMs |
120000 |
How long to wait for one upload |
registerSkill |
true |
Register the bundled picgo-upload skill |
registerCommand |
true |
Register the /picgo command |
announceSignIn |
true |
On startup, point a signed-out PicGo Cloud user at /picgo login
|
A patch replaces a row’s entire config rather than merging keys, so restate every field you want to keep.
Notes
Uploaded links are public. Anyone with the URL can open it, and a deleted file may stay cached. Fine for screenshots and doc images; think before uploading a contract PDF or an internal archive. The bundled skill tells the model to confirm first for anything that looks sensitive.
Your PicGo config is treated as read-only, with one exception outside this plugin’s control: when PicGo Cloud rejects a stored token, PicGo itself clears it from ~/.picgo/config.json. Signing in and out through /picgo login / /picgo logout also writes the token, as you’d expect.
Clipboard uploads need a desktop session and are only reachable through /picgo — the model is never given a way to upload your clipboard, since it can’t know what’s on it.
Development
pnpm install
pnpm build
pnpm test
To run it against a dsh source checkout without packaging, write a cordis.dev.yml (gitignored — the path is specific to your machine):
- insert:
    - id: picgo
      name: '/absolute/path/to/dsh-plugin/lib/index.js'
Then, from the dsh checkout:
pnpm dsh web --patch /absolute/path/to/dsh-plugin/cordis.dev.yml
The path must be absolute: a patch adds config but does not move the loader’s resolution root.
Releasing
@picgo/bump-version bumps the version, writes the changelog, commits, and tags in one step:
pnpm release          # patch: 0.1.0 -> 0.1.1
pnpm release:minor    # 0.1.0 -> 0.2.0
pnpm release:major    # 0.1.0 -> 1.0.0
pnpm release:beta     # 0.1.0 -> 0.1.1-beta.0
pnpm release:dry      # print what would happen, change nothing
Then push the tag — that is what triggers publishing:
pnpm push-release
The release workflow runs typecheck, tests, and build before publishing, and refuses to publish if the tag does not match package.json. Prerelease tags pick their own dist-tag (-beta.x → beta, -alpha.x → alpha, anything else prerelease → next), so npm install @picgo/dsh-plugin never resolves to a prerelease.
npm authentication
npm cannot configure a trusted publisher for a package that does not exist yet, so the first release and every later one authenticate differently.
First release — needs an NPM_TOKEN repository secret (a granular token with publish rights to the @picgo scope):
gh secret set NPM_TOKEN --repo PicGo/dsh-plugin
After that first release lands, switch to trusted publishing so no long-lived token is involved. On npmjs.com, open the package → Settings → Trusted Publisher, and register:
| Field | Value |
|---|---|
| Publisher | GitHub Actions |
| Organization or user | PicGo |
| Repository | dsh-plugin |
| Workflow filename |
release.yml (filename only, not a path) |
| Environment name | leave empty |
| Allowed actions | npm publish |
The workflow already sets id-token: write, so nothing changes on this side — npm picks OIDC over the token automatically. Once a trusted-publish release succeeds, delete the NPM_TOKEN secret and revoke the token, then set Settings → Publishing access to “Require two-factor authentication and disallow tokens”.
Trusted publishing needs npm ≥ 11.5.1, so the release workflow runs on Node 24 (which ships npm 11.x). Node 22 ships npm 10.x and fails with a misleading 404. That choice affects only the machine doing the publishing — the package itself still supports Node ^22.19.0 || >=24.0.0, and CI tests against 22.
Compatibility
Tested against DeepSeek Harness 0.1.0-rc.5 (commit 47f9438, 2026-08-13) and PicGo Core 3.0.1. Requires Node ^22.19.0 || >=24.0.0.
Harness is a developer preview and its APIs change often. If a release breaks this plugin, please open an issue.
License
MIT
Frequently Asked QuestionsFAQ
Use the verified command dsh plugin --profile default add github:PicGo/dsh-plugin in a DSH-enabled shell. The command resolves the public package metadata and keeps the plugin attached to the catalog identity shown on this page.
Compatibility follows the bundle and profile status shown above. If a profile is not detected, keep the plugin disabled there and check the repository documentation before enabling it in production.
The GitHub link and activity metadata are the source of truth for releases and maintenance. Revisit this page after a new release to confirm the catalog has observed the latest version.